lost contact palette tool
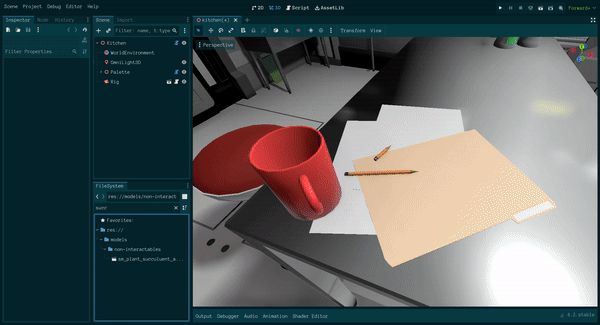
Like I mentioned last time, the art pipeline for the game I'm working on is designed to lower the iteration time so that I can iterate more quickly and frequently on how the levels look. However, I ran into an issue where our desired process still had a long iteration time due to how Godot works out of the box. So, I've created a tool which you can see pictured above.
Neat, right? Read on to see the motivating reason for making this and how it was implemented.
the problem
The 3D models are structured like a coloring book, with one material slot for each color that can be applied to a model. For example, here's a model of a succulent:

This succulent has four material slots, and we can set a material on each of these slots:
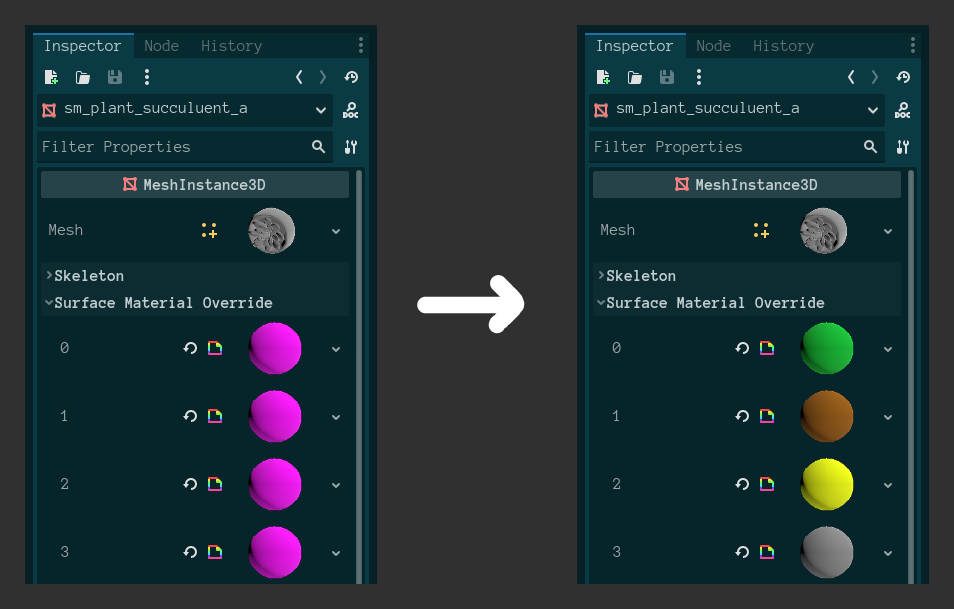
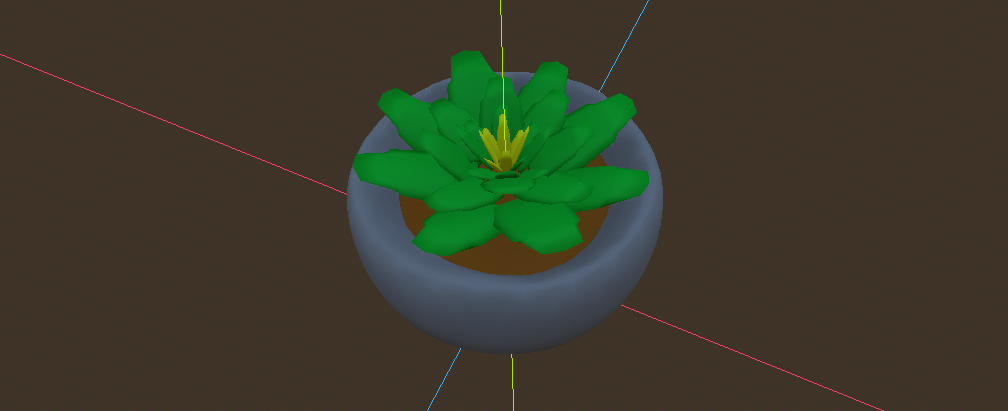
And this has the effect of coloring the succulent:
However, setting the material to change the color is cumbersome. Even though materials allow you to change many aspects of how to render an object, we don't need this kind of flexibility all the time. In fact, most of the time, we only really care about changing the color.
In order to set the material, we have to go through several steps:
- Create a new packed scene containing the object we want to place in the scene.
- For each material override slot in the
MeshInstance3D...- Create a new material in the override slot
- Click on the material to expand its properties.
- Change the color property to the value we want.
- Place that new packed scene into the scene we want to use.
- Repeat for each color variation of that item we want.
This is a huge burden on iterating as we want to add a large number of items in many different colors.
tooling
Ideally, the process should instead be:
- Add the model directly to the scene.
- Click on the model to set the colors to use in each material slot.
And, in the case of using the same color between
multiple objects, it would be nice to have some kind
of palette that we can refer to. The
tooling to make this work requires several parts: a
post-import script, a Brush script, and
a Palette script.
The post import script is pretty straightforward. All it needs to do is add the brush script to the root of a scene. It does a few other things in lost contact, but for the purposes of coloring that is all it needs to do.
@tool
extends EditorScenePostImport

const BRUSH_SCRIPT = preload("res://addons/coloring/brush.gd")

func _post_import(scene: Node) -> Object:
	scene.set_script(BRUSH_SCRIPT)
The Brush script acts as the
interface in the editor that we use to edit the
colors of a model without requiring us to create an
inherited scene or making children editable first.
The idea here is to show a color picker for each
material slot in each mesh for a model file. Since I
don't know how many material slots there will be
ahead of time, I created an inspector
plugin so I could update the inspector
accordingly:
@tool

var color_refs: Dictionary = {}

func _get_property_list() -> Array[Dictionary]:
	var properties: Array[Dictionary] = []

	# Tell Godot to store, but not show, the color information
	properties.append({
		"name": "color_refs",
		"type": TYPE_DICTIONARY,
		"usage": PROPERTY_USAGE_STORAGE,
	})

	# Tell Godot what we want to draw in the inspector
	for i in materials.size():
		properties.append({
			"name": "Color %d" % i,
			"type": TYPE_COLOR,
			"usage": PROPERTY_USAGE_EDITOR,
			"hint": PROPERTY_HINT_NONE,
			# We use this hint string later to tell Godot that we want to
			# use a custom inspector property called `ColorRefProperty`
			"hint_string": "ColorRef"
		})

# This is how Godot retrieves the value to show in the inspector
func _get(property: StringName) -> Variant:
	for i in materials.size():
		if property == get_color_property_name(i):
			if color_refs.has(i):
				return color_refs[i]
			else:
				return Color.MAGENTA
	return null

# This is how Godot tells us the new value that we should store
func _set(property: StringName, value: Variant) -> bool:
	for i in materials.size():
		if property == get_color_property_name(i):
			color_refs[i] = value
			return true
	return false

func _process(_delta) -> void:
	# Set the material that we want to use with the desired color
	for i in materials.size():
		update_material(i)
The real Brush script is more
complicated, but that's the gist of it. By itself,
the Brush script allows us to set a
color directly on a model.
However, we often want to share colors between
many models. For this, the Palette
script gives us a way to share a color between
multiple objects:
@tool
class_name Palette
extends Resource
# This is where we store the shared colors
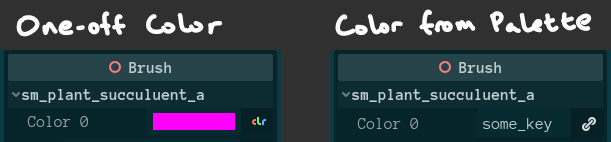
var swatches: Dictionary = {}The idea is that if we'd like to use a color from
a palette, we can store the name of the swatch in
the palette that we'd like to use instead of the
color itself. The Brush script lets us
do that by using a custom inspector property called
ColorRefProperty, which lets you choose
either a one-off color or a color in a palette by
adding a button to the side that allows you to
change which one you want.
the result
All three of these pieces -- the post-import
script, the Brush script, and the
Palette script -- allow me to add new
models directly to a scene and edit the colors
however I wish. This makes iterating easy, to the
extent that I can create entirely new
scenes and color them in a day's work while being
frequently distracted.
This tool aligns with my guiding principle to make it trivial to explore possibilities. The low barrier to editing and tweaking make the act of creating levels pretty enjoyable for me. And even though it took me a little over a week of development time to make, it feels like the cost was well worth it.
As an aside, I am considering open-sourcing the palette plugin, but it probably won't happen for a while if I do decide to do so. This is because many aspects of the tool are currently too specific to lost contact to be appropriate for more general use. First, I would like to use the tool for a while to see what can be improved on and be free to make those changes as I wish without worrying about compatibility issues, releases, or any of the other work related to making something open-source and maintaining it.
I didn't go into full detail, but hopefully this helps if you are interested in building out something similar. If you have any questions, feel free to drop a comment or an ask.