lost contact art pipeline
Today I broke ground on my first day making lost contact by (mostly) figuring out how the asset pipeline would work. As a test, I put together some of the 3D assets that @Titanseek3r (who I will refer to Tanuki from here on out) has made over the last few days.
One of my guiding principles is to make it trivial to explore possibilities. To that end, I want to develop an art pipeline that allows me to change aspects quickly and easily at any time. I don't want to have to go back and forth between tools or ask an artist for frequent revisions to tweak aspects of the game, especially since lost contact, as a hidden object game, will need lots of tweaks to the placement of things.
I discussed this strategy with Tanuki (who, thank goodness, knows much more about 3D art pipelines than me) and, with respect to this strategy, we agreed on the following aspects:
- Design models in a way that they can be recolored at runtime.
- Models will be designed into modular pieces so they can be snapped together in the editor to create a variety of scenes.
- Avoid texturing the models as much as possible.
- Rely on decals to provide more detail to scenes (and make the decals recolor-able too).
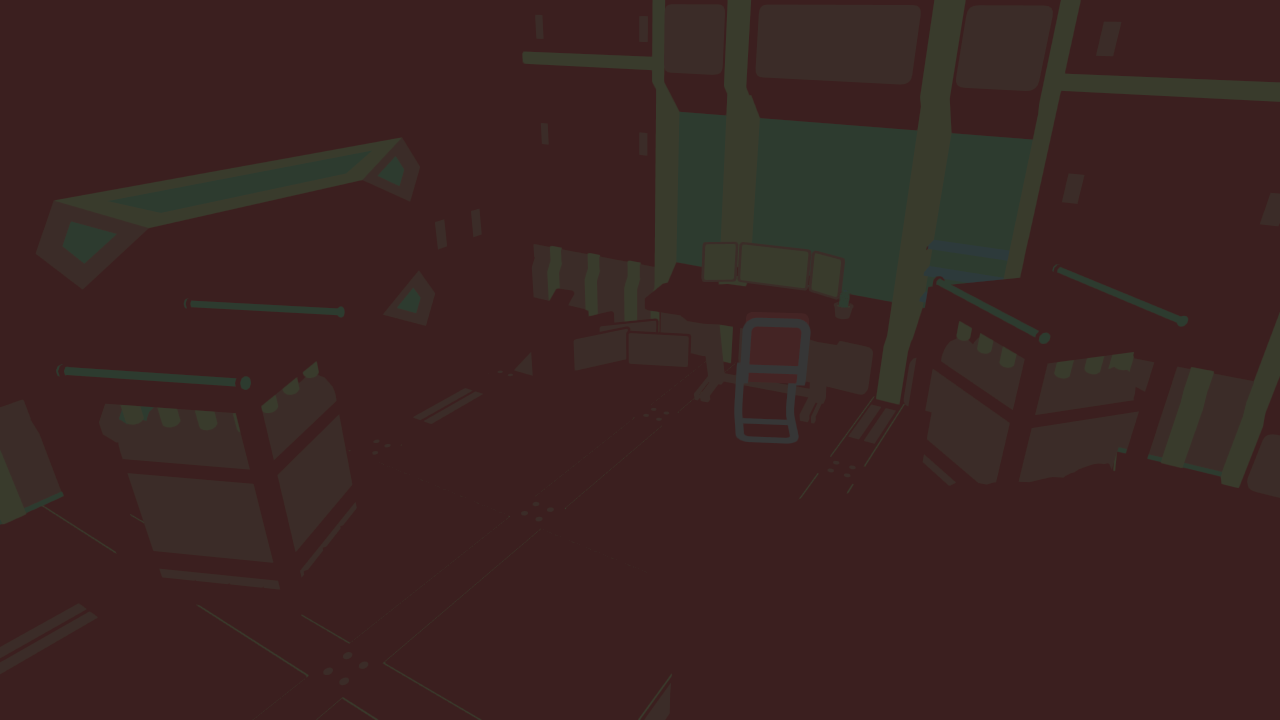
First, I had to assemble all of the models into a
scene. I tried to use GridMap, but
since our modular tiles are not uniform sizes, this
didn't work well. You can see in the following
picture that everything looks awful; all of the
models made by Tanuki had default placeholder
materials with the colors pink, green, and yellow.
You can imagine the assets at this stage as a new 3D
"coloring book".
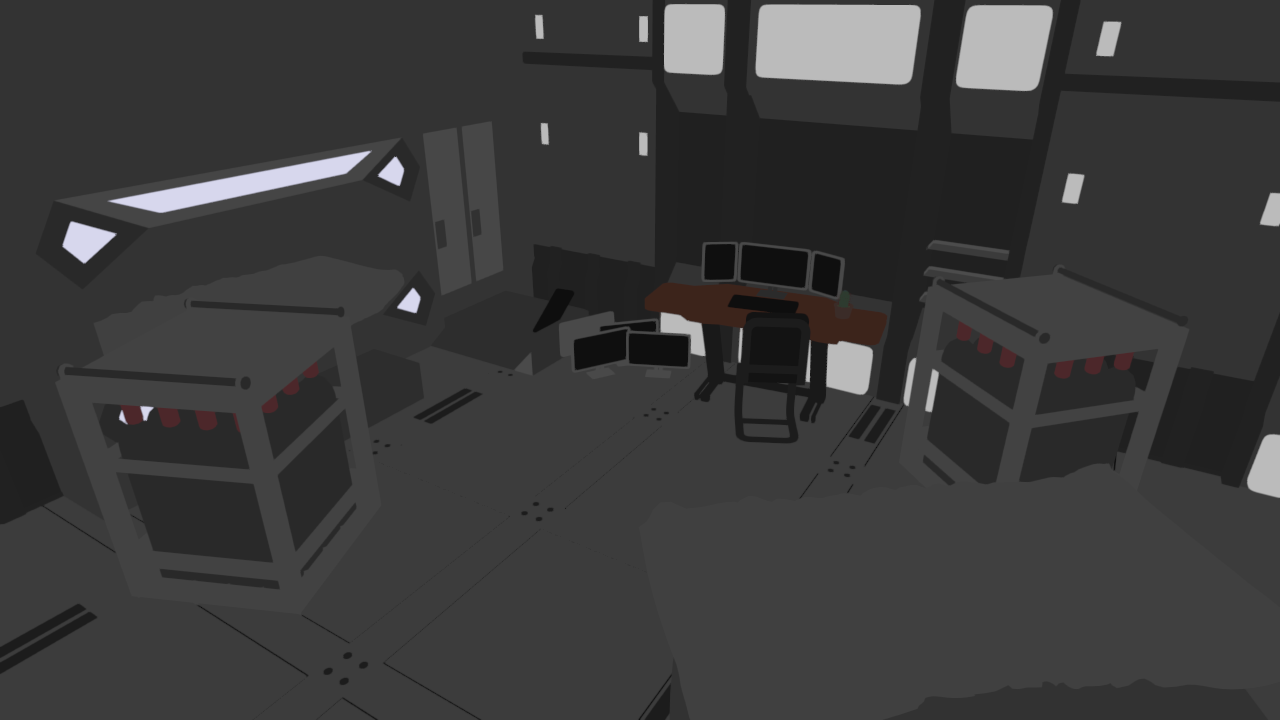
Then, I created materials to fill in each material slot of the models. This colors in the "coloring book".
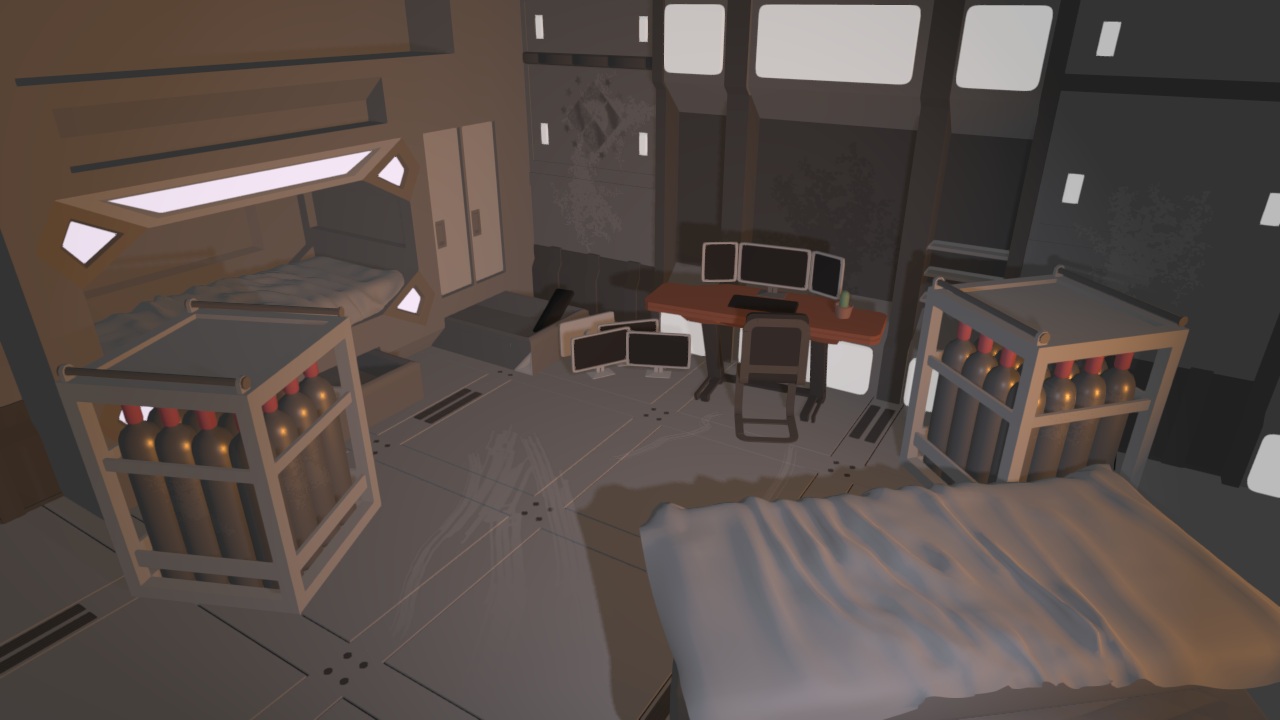
Then, I created some simple 2D textures and used them as decals to detail the scene.

Then, I added some lights...
And finally, I set some environment settings in Godot, including ambient light, SSAO, glow, volumetric fog, and some contrast and saturation tweaks:
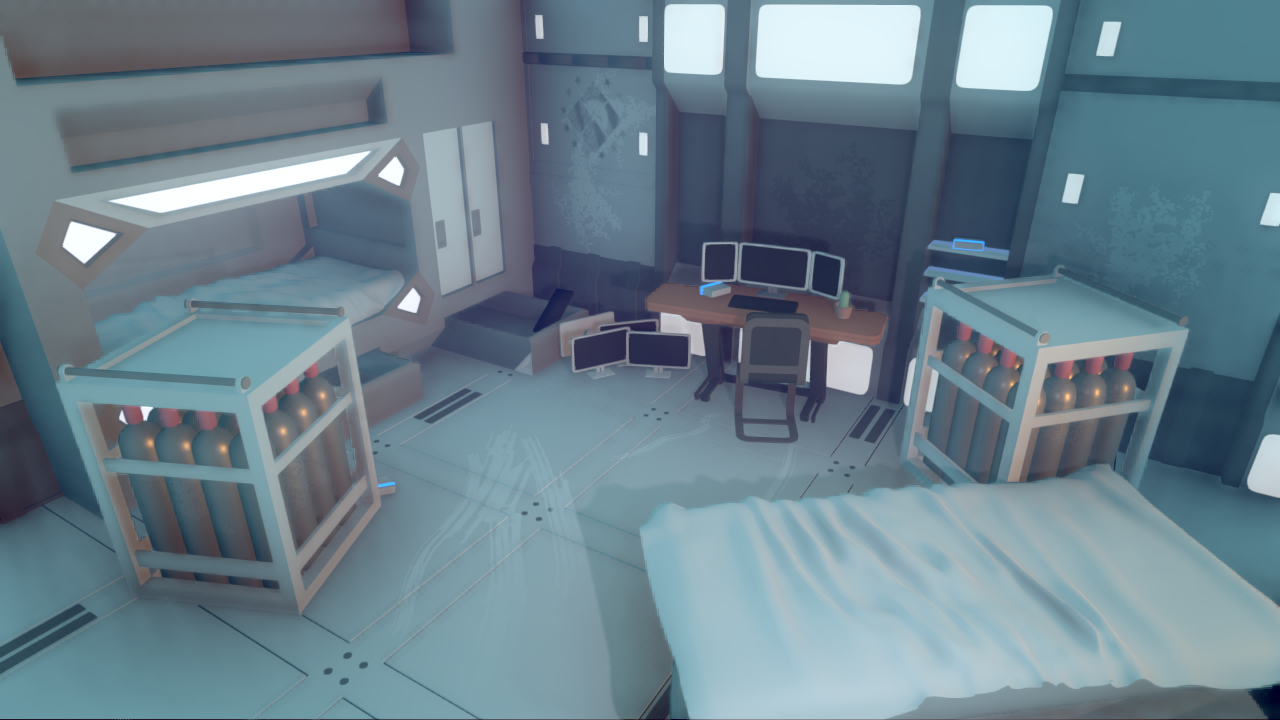
I was able to figure out the pipeline from scratch today and the result is pretty good, so I'm happy with it. It feels pretty nice to not get stuck hopping back and forth between different editors to make changes and I'm looking forward to making more scenes with this approach.