custom navmesh baking in godot 4

One of the things that really bothered me with navigation and tilemaps in Godot 4.X is that it didn't really do a good job of picking what I thought was a good path. A few weeks ago, I decided to implement my own navmesh baking algorithm. Looking back on it now, you could say that my solution is inefficient and akin to hammering in a nail with a sledgehammer, but it works and I'm pretty happy with how it turned out.
the problem
Godot 4.X tilemap navigation maps are not baked, so they look like this: 1
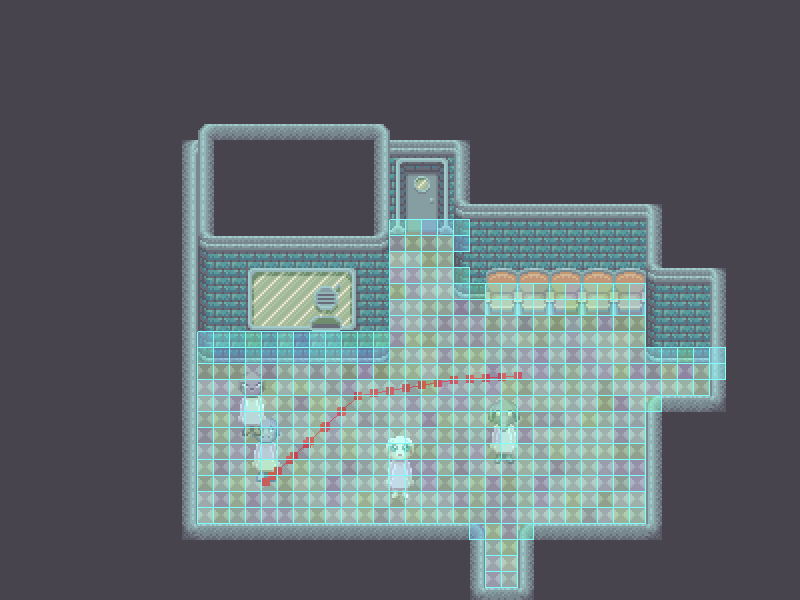
This happens if you assign a navigation mesh to
each tile in the TileSet editor. There
are a few problems:
- The navmesh tiles don't account for walls or furniture, so navigation agents don't avoid them properly. This is annoying, because it's burdensome to make sure the floor tiles are never used in an incorrect place.
- The pathing on the navmesh doesn't opt for a straight line from point A to B. I'm guessing this is because of how the A* path searching works when dealing with many small navigation polygons.
Now consider what happens if you draw the
navigation mesh manually:
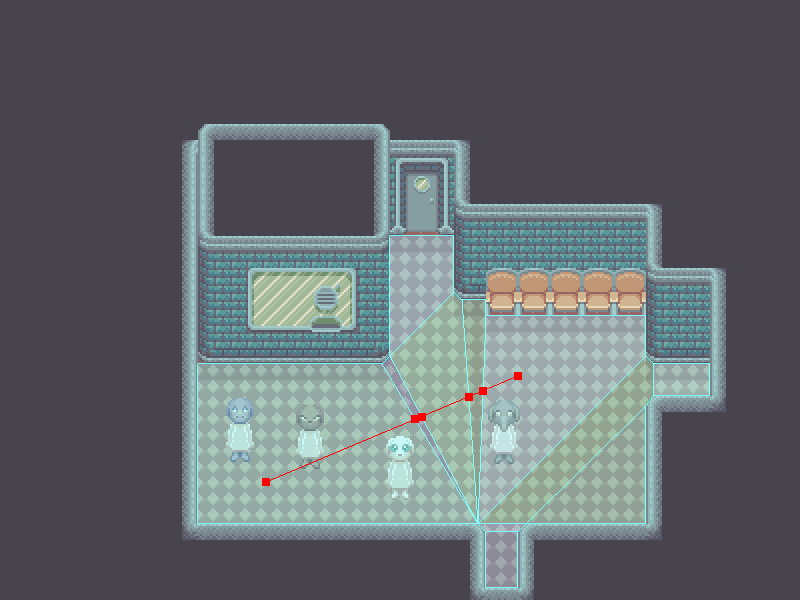
Now, the navigation agent picks what I think is the correct path. Additionally, the navmesh doesn't overlap with walls or furniture. This is nice, but also annoying. I don't want to have to draw in the navmesh manually each time I changed the level! The floor can be pretty complicated to draw in when you consider rounded corners and overlapping furniture. And I'd also have to deal with the fact that the navmesh actually needs to be a bit smaller than the entire area in order to account for how big the agents are, which I didn't do in the above example.
the solution
So, I decided to use Godot's geometry libraries to address this problem. I threw up the unpolished code on GitHub for you to take a look, but I'll take some time here to explain it more thoroughly step by step along with examples.
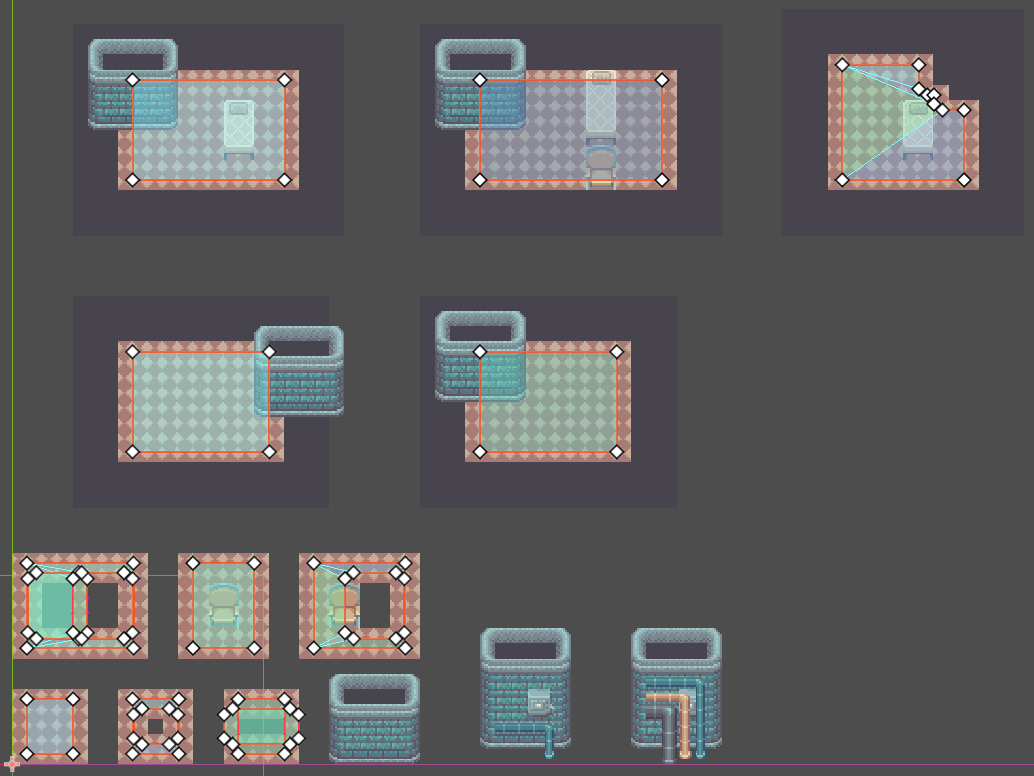
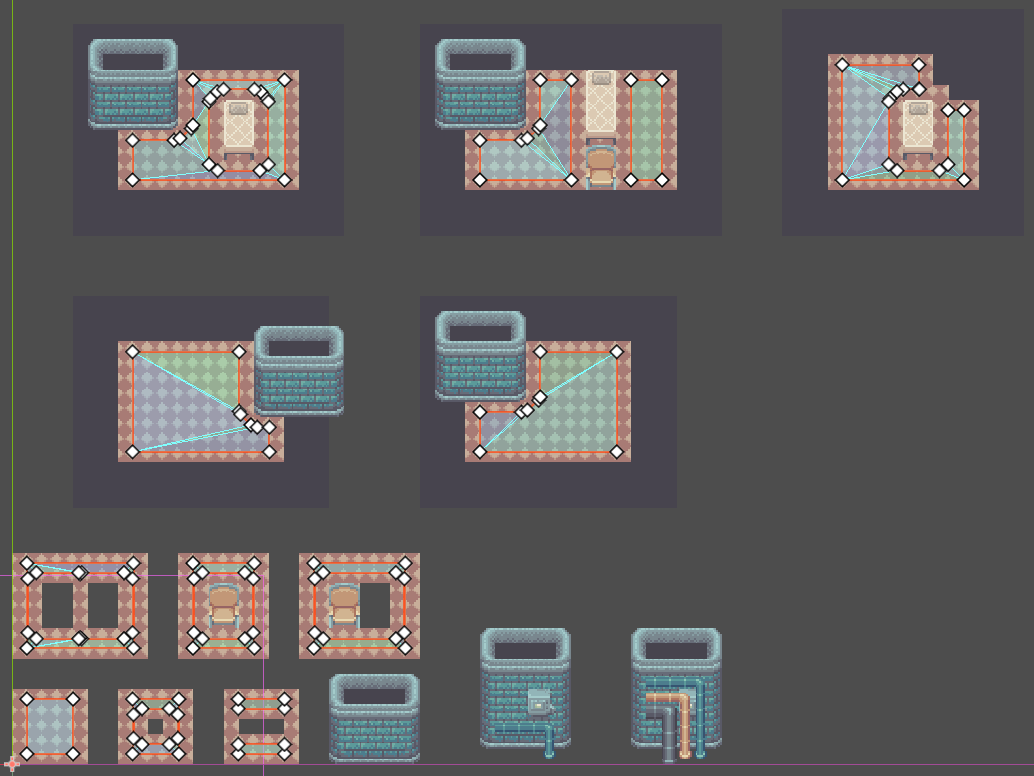
navmesh
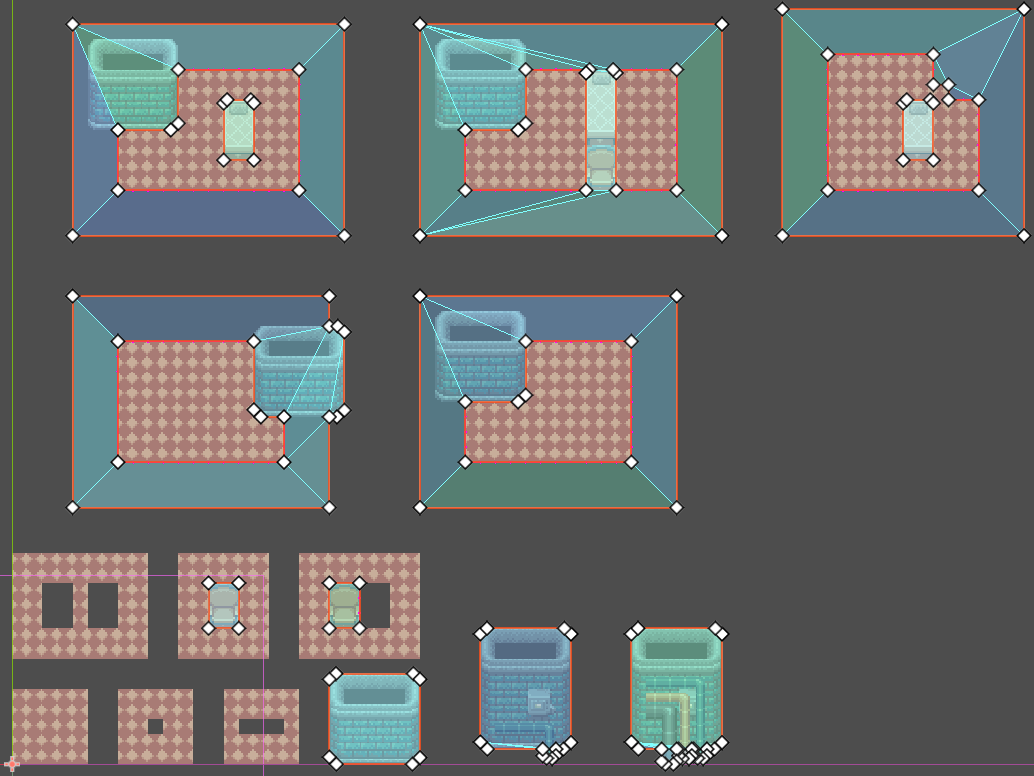
First, we need to collect all of the navmesh
polygons from the tilemap data:
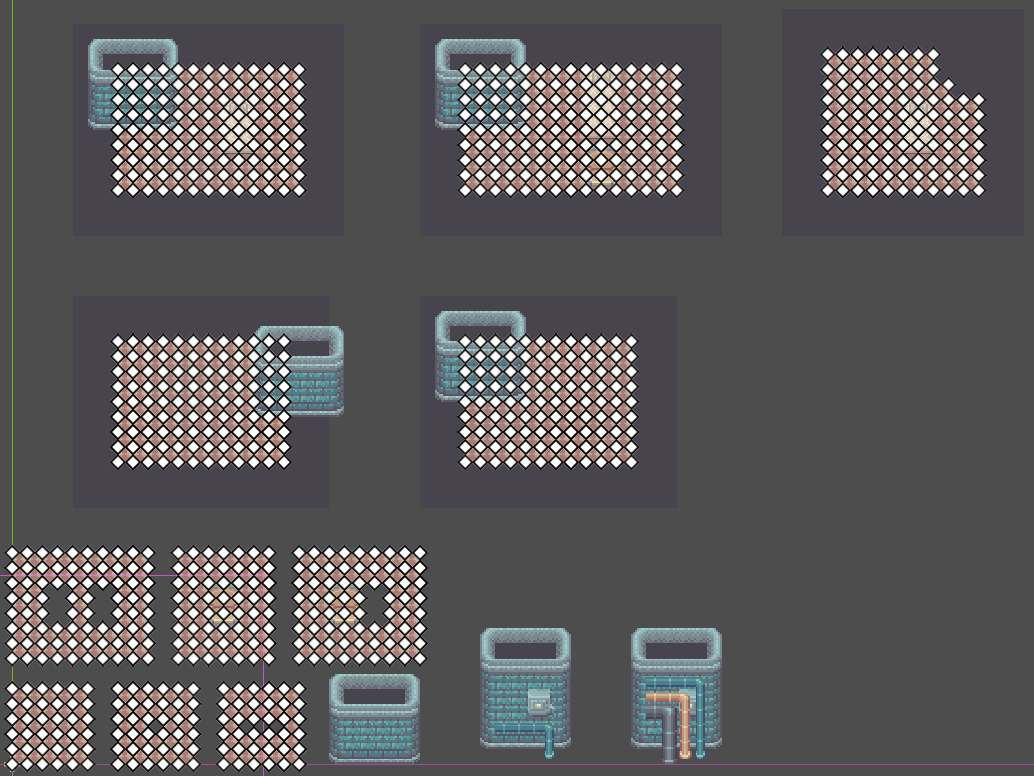
This is done by looking up the navmesh data for each tile. In my case, each navmesh polygon is a simple square, but I could have more complicated navmesh shapes with this approach as long as the tile navmesh doesn't have a hole.
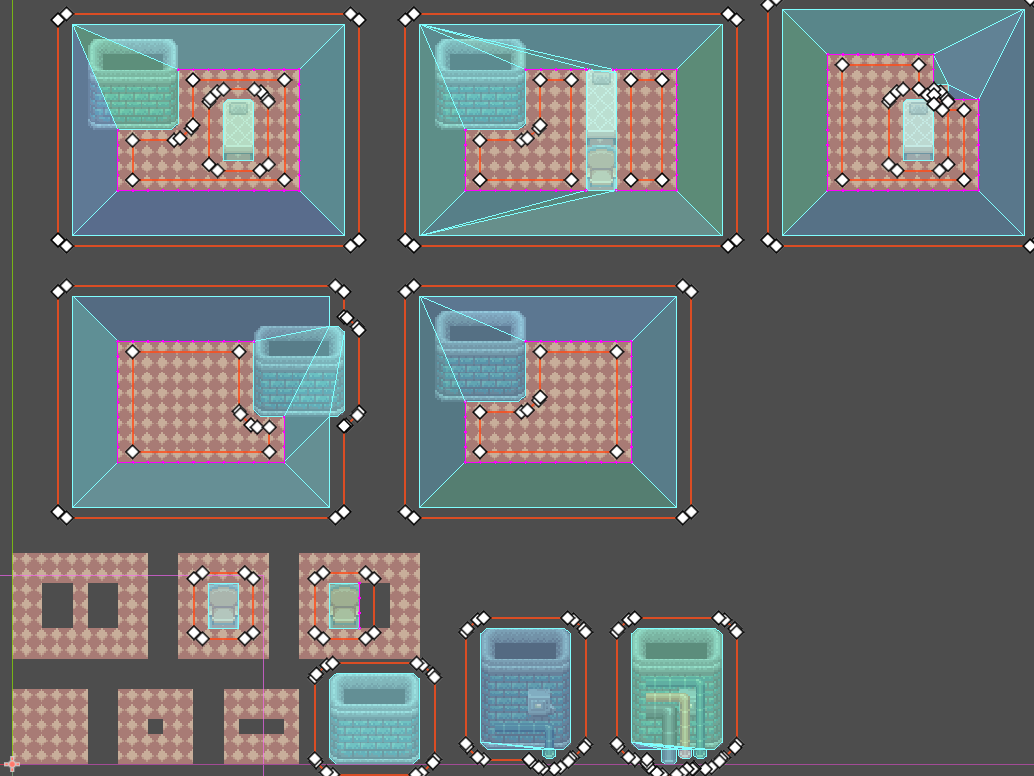
Then, we combine the navmeshes together:
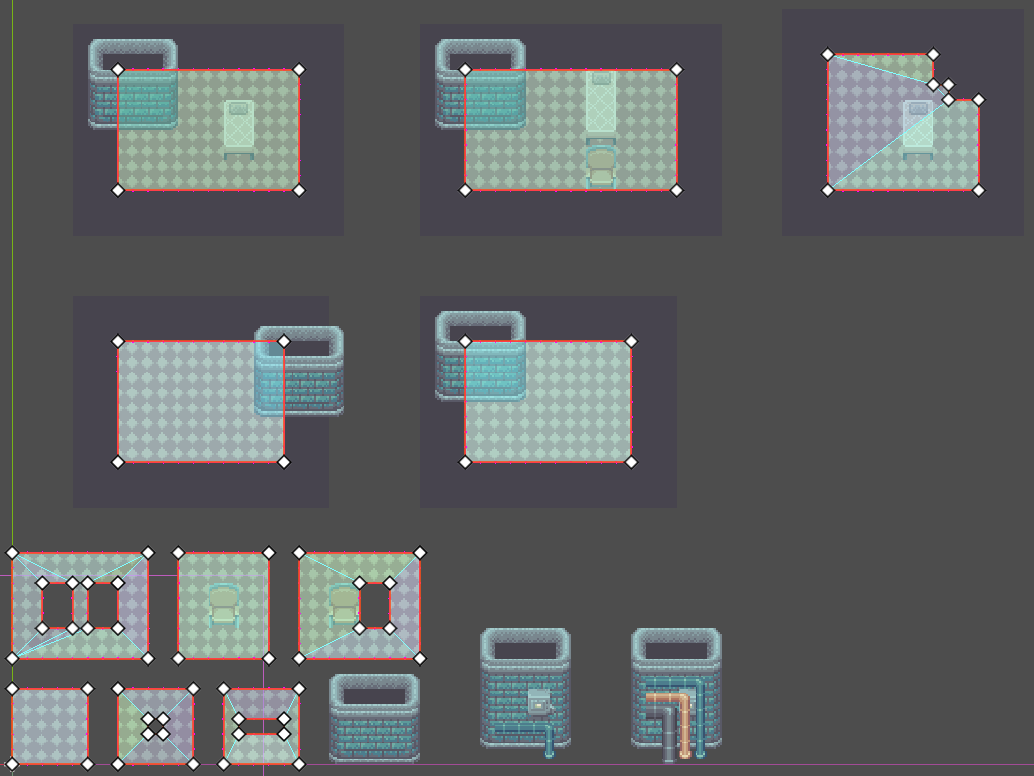
I found that for this step, I got much better
behavior by sorting the cells by position before
merging them with
Geometry2D.merge_polygons. If I don't,
Geometry2D sometimes fails to combine
more complicated shapes which should be
combined.
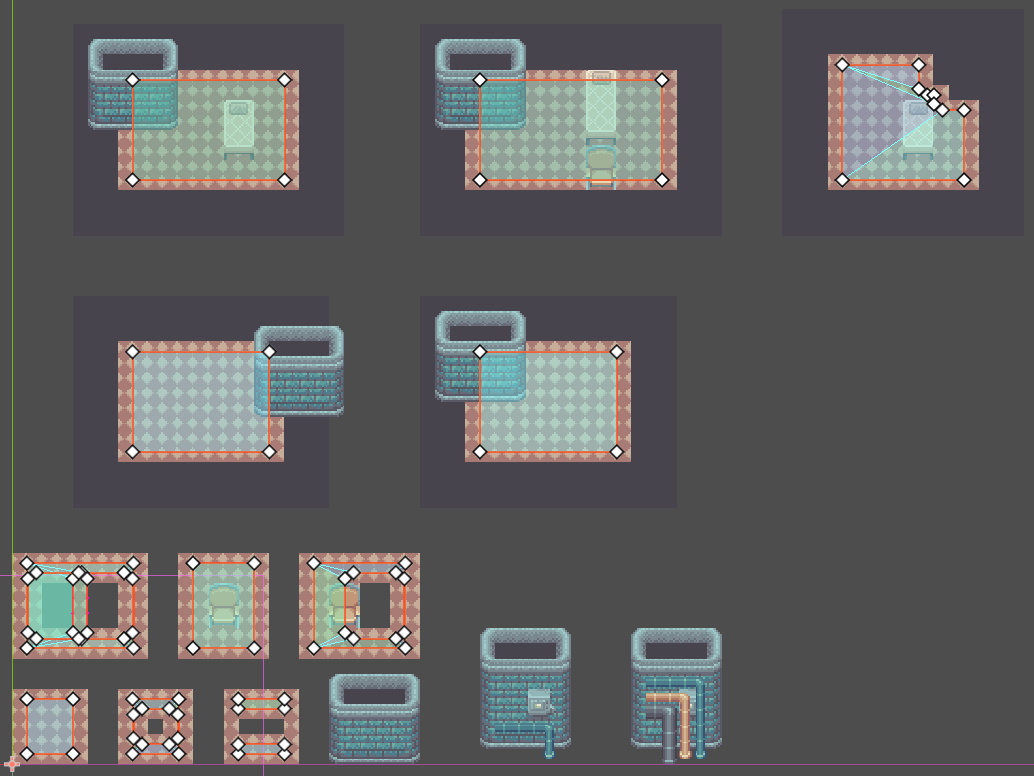
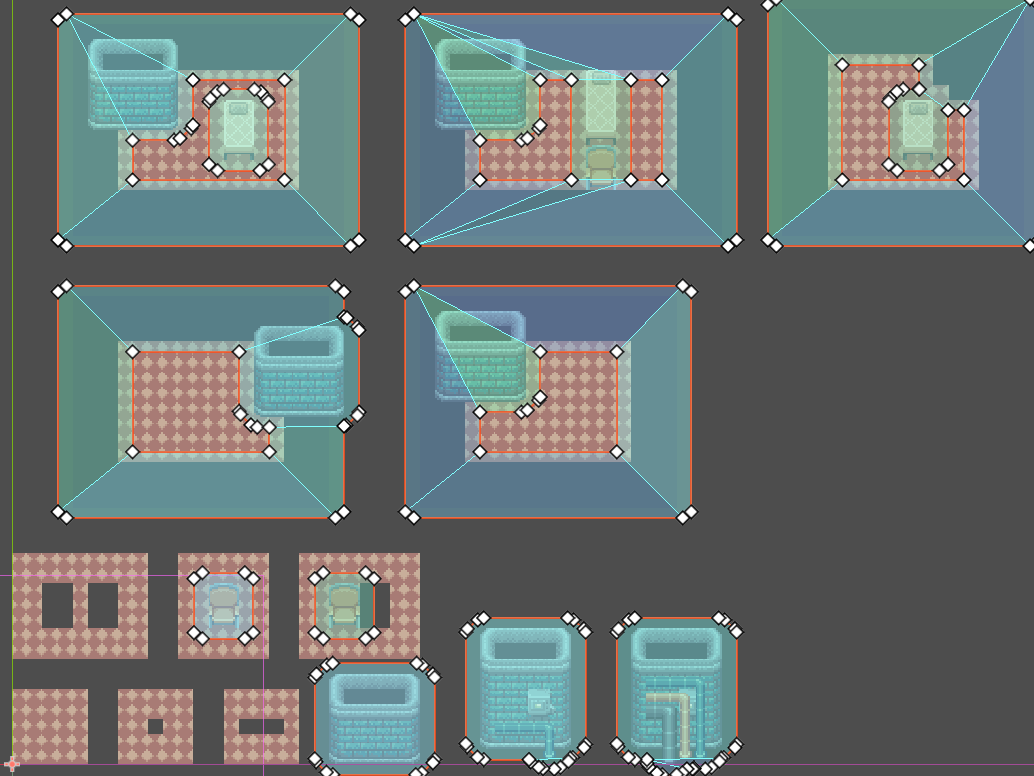
Then, I adjust the navmesh to account for the
agent size:
Notice how the navmesh needs to be shrunk when it's a solid polygon but enlarged when it's a hole polygon. I also wanted to have an agent that was wider than it is tall, so I shrink the navmesh more in the x direction than in the y direction.
This is done by scaling the navmesh by the ratio
of the agent's dimensions, using
Geometry2D.offset_polygon to resize the
polygon by one of the agent's dimensions, and then
undoing the scale.
For example:
- If your agent is 4 px wide and 8 px tall, then the width:height ratio is 0.5.
- Scale the y positions of the navmesh by the
ratio
0.5 - Call
offset_polygonwith the half of the agent's width-2to shrink the polygon. We only need to shrink the navmesh by half of the agent's width, since that's the distance from the agent's center. - Scale the y positions of the navmesh by the
inverse ratio
2.
This has the effect of applying a shrinkage of 2 in the x-direction and 4 in the y-direction. You can also do it with the height:width ratio, but then you'd need to flip which axis you modify or dimension you use in each step.
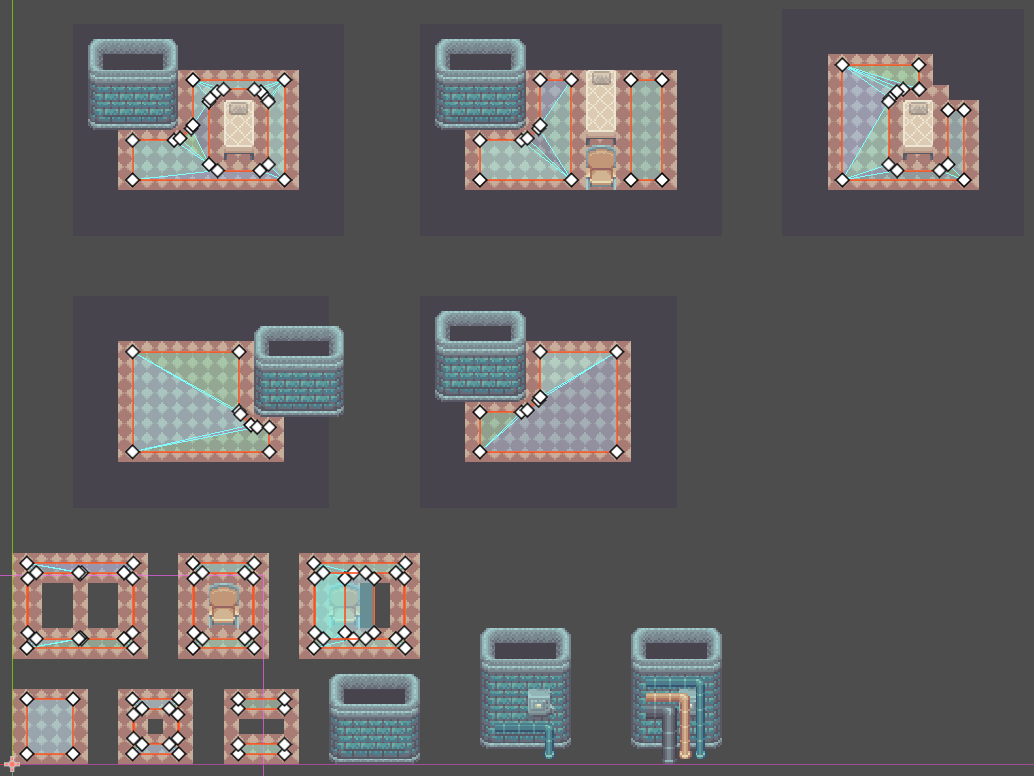
Then, you clip the polygons:
You need to perform this step because after adjusting the polygons, you may end up with hole polygons that are either bigger than or intersect with the solid polygon containing them. If the hole polygon intersects with a solid polygon, that means the solid polygon has either been reduced or split into multiple pieces. If the hole polygon covers a solid polygon entirely, then the solid polygon needs to be removed.
Finally, you need to combine the holes
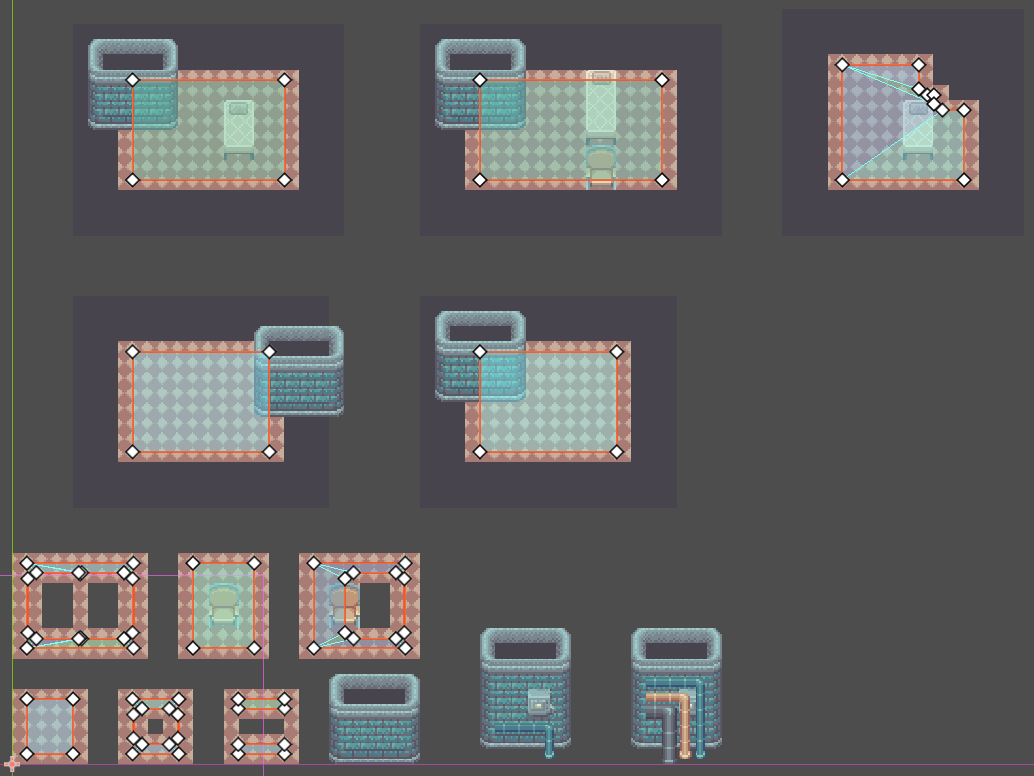
You can still have overlapping hole polygons due to holes being close to each other. You either need to merge each hole polygon that intersects with another or drop the hole polygon which is fully contained within the other hole polygon.
This gives us the complete navigation polygons covering the entire floor.
colliders
Next, lets set aside the navigation polygons for now and build the polygons for for colliders like walls and furniture.
The steps we do with the collider seem pretty
familiar to what we did with the navmesh. First, we
need to collect all of the collision polygons from
the tilemap data:
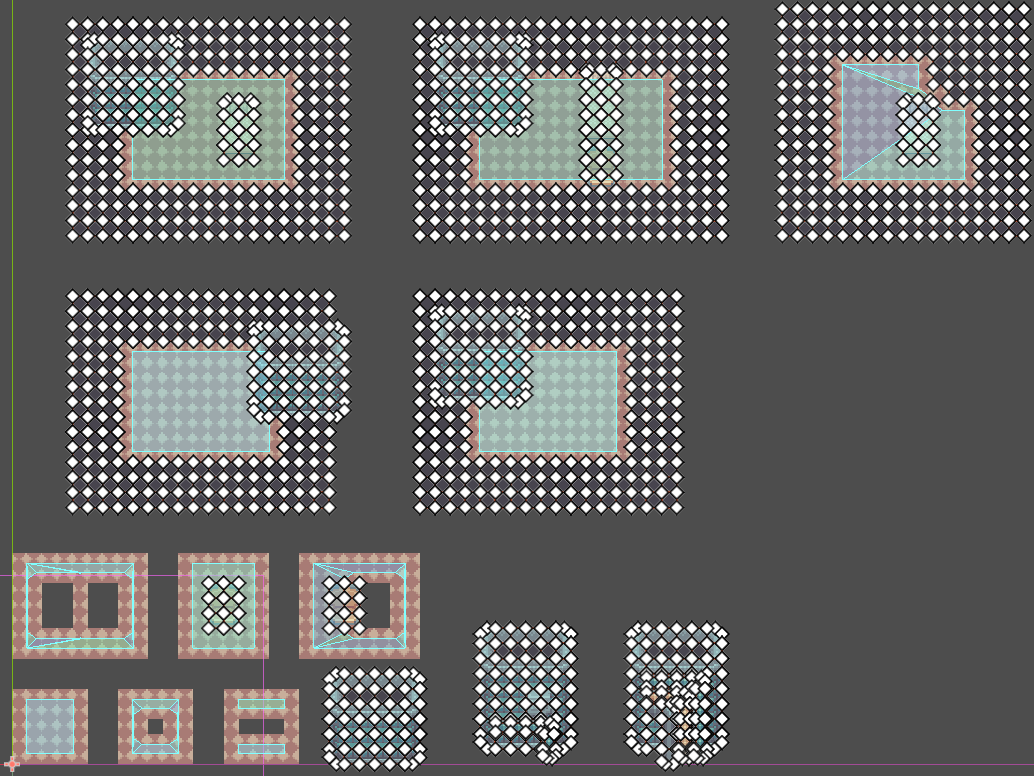
Then, we merge those polygons:
Then, we adjust them to account for the agent
size:
Then, again, we need to resolve cases where
polygons intersect.
This case is a little different though; since we shrank holes and enlarged solids (the opposite of what we did for the navigation mesh earlier), we want to reduce the size of the hole polygons instead of the solid polygons.
This gives us the complete collider polygons covering all of the obstacles in the level.
subtraction
Finally, now that we have all of the navigation polygons and collider polygons, we can subtract them from one another.
So, we subtract the collider polygons from the
navigation polygons:
And lastly, we need to combine holes created by a
collider and holes created by a gap in the
navmesh:
And that gives us our final result!
final notes
There is certainly a more efficient way to do this, but this was the most straightforward and low-cost solution for me to implement and seeing each step happen one by one with all of the cases side-by-side really helped me understand what was going on. I hope you found this breakdown useful!